|
|
 |
|
 |
|
Thank you for your support! Our photography competition and feedback from workshops, reviews and challenges is growing steadily as we approach the end of August. We are thrilled to see new entries from across Australia showcasing the diverse talent within our community.
Each submission brings a unique perspective, and it's a privilege to witness the stories captured through your lens. Our goal is to continue fostering a space where creativity flourishes, providing valuable feedback to help refine your skills while inspiring you to explore new techniques and ideas.
As we look ahead, we invite you to share this passion with others. If you know someone who hasn't picked up their camera in a while or someone eager to start their photography journey, encourage them to join us. Together, we can continue to cultivate a vibrant community where every photograph tells a story worth sharing. Your support is invaluable, and we look forward to seeing where your photographic adventure takes you next.
|
|
 |
Monthly photo competition |
|
Theme: Macro | Week #4: Everyday Objects
Are you ready to challenge yourself this week? We want to challenge you to capture everyday objects using macro techniques. Please read the photography tips below for some inspiration on this theme, which will help you learn and become motivated to get creative with your camera.
How to Enter:
To participate, simply complete the submission form on our new entry portal on our website. Make sure your entries align with this month's theme. For additional guidance, check the photographic tips below.
Please only submit your photos through our website; do not send them via email as we will only consider photos submitted through the portal.
Prizes:
1st Prize: NiSi 100mm V7 Starter Kit, valued at $849 RRP.
2nd Prize: NiSi NM-200S Macro Focusing Rail and NiSi Close Up Lens Kit, available in winner's choice of 77mm, 58mm, or 49mm, valued at up to $588 RRP
Deadline:
All entries must be submitted by September 1st, 2024.
Make sure to read the FAQ on the competition page at the link below to understand all the details and rules of the competition.
We look forward to receiving your photos and celebrating your creativity!
|
|
|
An interesting fact about close up lens kit 77mm (with 67 and 72mm adaptors) |
|
The NiSi Close Up Lens Kit NC 77mm II (with 67 and 72mm adaptors) allows a telephoto lens to function as a macro lens with a large working distance. It’s compatible with zoom or prime lenses in the focal length range of 70-300mm (full-frame equivalent). The close-up lens is the most effective way to achieve a closer minimal focal distance. The magnification achieved depends on the focal range of lenses, it will be higher with longer focal lengths. The magnification will be close to 1:1 when you focus at 200mm. |
|
 |
 |
Sony releases two new 4K camcorders |
|
Sony has announced two new AI-powered 4K camcorders, the PXW-Z200 and HXR-NX800, which integrate advanced Sony Alpha technology. Both models feature a 1-inch Exmor RS CMOS sensor, 20x zoom lens, and AI-enhanced autofocus and auto framing. They can record 4K video at up to 120p with advanced stabilisation and support for various professional video profiles. The PXW-Z200 is designed for professional broadcast use as it includes SDI, while the PXW-NX800 is aimed at more run-and-gun weekend productions. Both camcorders are available to pre-order now. |
|
|
 |
|
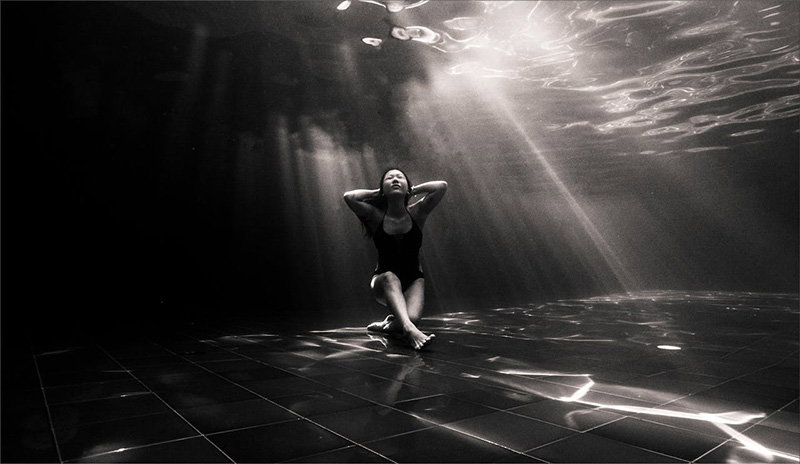
Black and white photographer of the year winner announced |
|
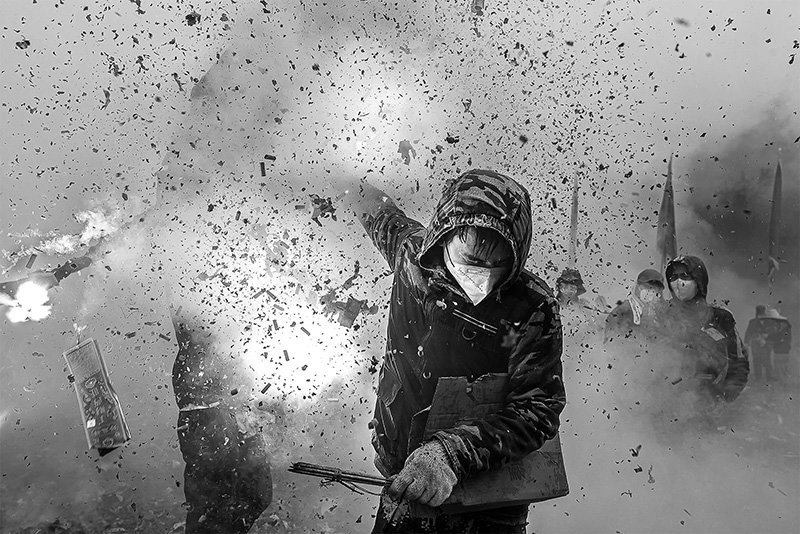
The 2024 Black and White Photo Awards celebrated the artistry of monochrome photography, recognising top talents across various categories. Haikun Liang was awarded Black and White Photographer of the Year for their evocative image "Destroy Together," while László Tóth received the Special Prize for Creativity with "Spiral to the Tower." The competition, judged by a panel of esteemed photographers, received nearly 5,000 submissions, highlighting the enduring appeal and expressive power of black-and-white imagery in modern photography. |
|
|
|
This movie centres around film photography |
|
The film Camera, directed by Jay Silverman, explores the power of film photography to connect people through the story of a mute boy named Oscar and an eccentric repairman. Set in a struggling fishing town, the narrative revolves around their bond formed while repairing a vintage twin-lens reflex camera. The movie, starring Beau Bridges and Miguel Gabriel, emphasises the nostalgic and emotive aspects of analogue photography, symbolising the importance of capturing life's fleeting moments. Camera is available for streaming on Amazon and Apple TV. |
|
|
 |
This week we invite you to enter macro photos of everyday objects. Photos submitted for the monthly photo competition should represent a macro theme from this week or prior weeks. Try and incorporate some of the tips below into your skill set to take your photo taking skills to the next level. |
|
 |
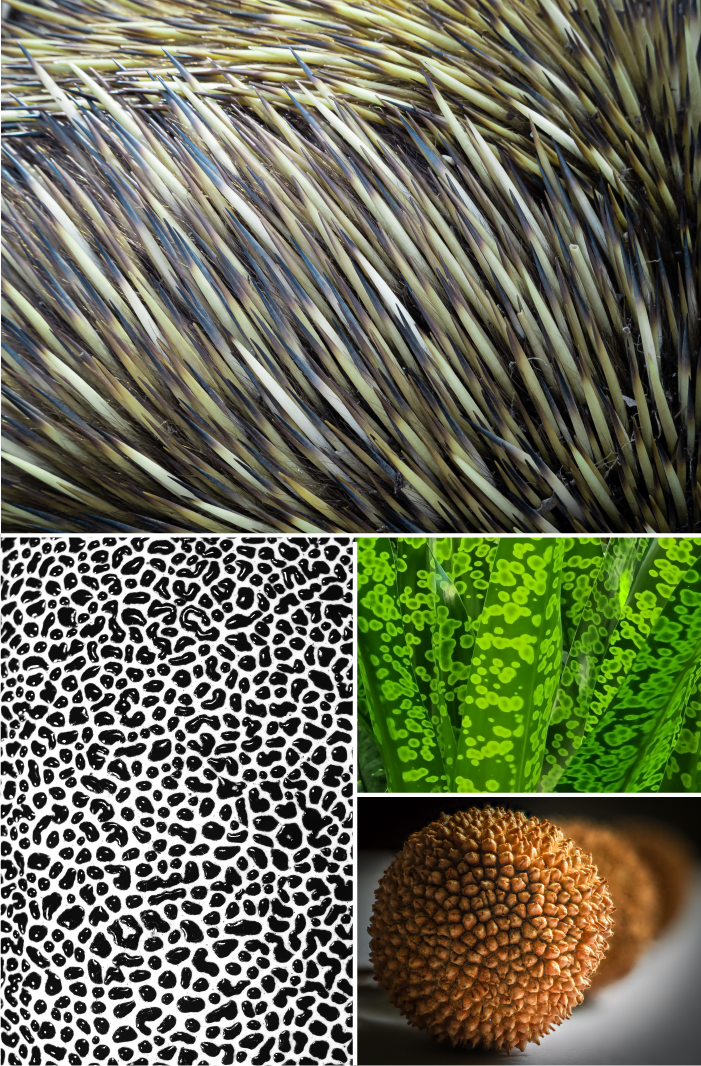
Look at objects differently
It is crucial to train your eye to see beyond the obvious. Often, we overlook the intricate details of mundane items, yet these details are where the true beauty lies. Macro photography allows you to capture these tiny elements, such as the delicate textures of food or the intricate patterns on a piece of fabric. To achieve this, try to approach your subjects from unconventional angles or focus on specific areas that are usually ignored. By doing so, you can create images that reveal a fresh perspective on familiar objects.
Managing highlights is key in macro photography, as the small details can be easily lost if the exposure is not carefully controlled. Use exposure compensation to fine-tune your camera's exposure settings and avoid blown-out highlights, especially in brightly lit environments. A slight reduction in exposure (1 stop) can help maintain detail in the highlights without sacrificing the overall brightness of the image. To ensure your exposure is correct, always check the histogram on your camera after taking a shot. The histogram will provide a visual representation of the exposure, allowing you to make adjustments on the spot if necessary.
|
|
 |
Light your subjects evenly with a two-point lighting system
Consider a two-point lighting system to achieve even lighting that enhances the details of your subject. This setup involves positioning two light sources, such as LED panels or monolights, on either side of your subject. The key is to ensure that the light is soft and diffused, which can be achieved by using diffusers or softboxes on the lights. Soft lighting reduces harsh shadows and highlights, allowing the fine details of the object to be captured more clearly.
For a more dramatic effect, you can introduce a high-contrast look by adjusting the intensity of the lights. To do this, position one light source slightly closer to the subject than the other, creating a gentle shadow on one side while maintaining overall illumination. This contrast can make the subject stand out against the background. Experimenting with different light positions and intensities will allow you to find the perfect balance between light and shadow, enhancing the visual appeal of the subject you're photographing.
|
|
 |
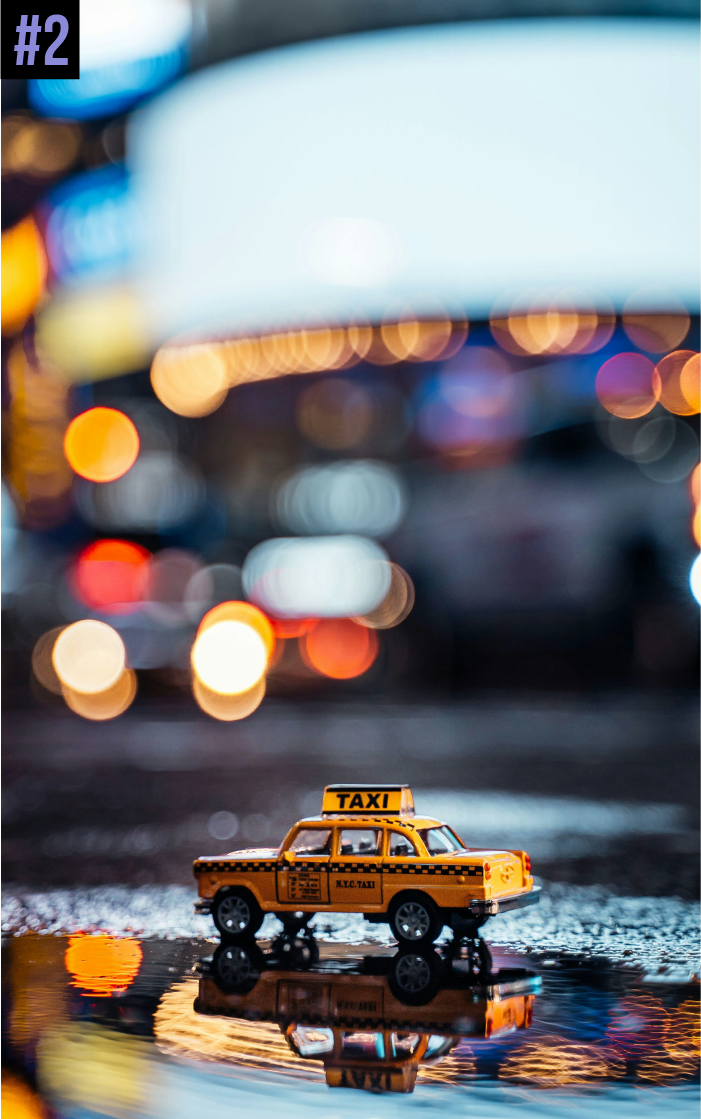
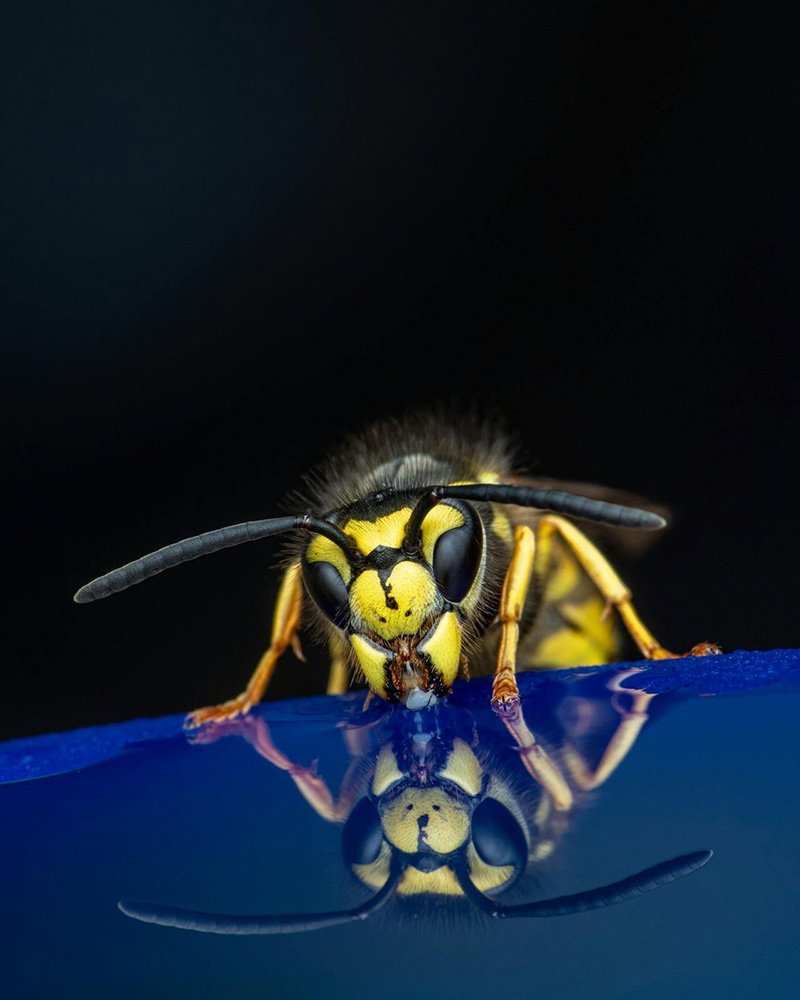
Try adding a mirror to your shot
Incorporating a mirror into your macro photography can transform a simple shot into a visually striking image. Instead of placing your everyday object on a table, try positioning it on a mirror. The reflection created by the mirror adds an extra layer of depth and symmetry to the photograph, making the object appear more dynamic and intriguing. When setting up this shot, pay close attention to the angle of the mirror and the position of your camera to ensure that the reflection complements the composition without distracting from the subject itself.
To capture this effect, select appropriate camera settings that will highlight the reflection while maintaining sharpness in the main subject. A good starting point is to use a narrow aperture, such as f/4 to f/8, which will provide a greater depth of field, ensuring both the object and its reflection are in focus. Pair this with a low ISO setting, around 100 or 200, to minimise noise and preserve detail. Adjust your shutter speed based on the available light, typically around 1/125 to 1/250 seconds. You'll also find a focal length of 90mm to 105mm is ideal for this type of shot as it will allow you to be further away from your subject, increasing the 3D look in your image.
|
|
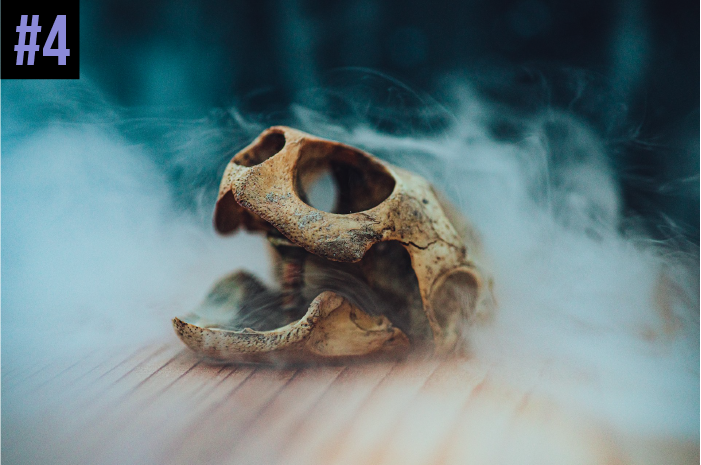 |
Add water or smoke to create atmosphere
Adding elements like water or smoke can greatly enhance the visual appeal of your macro photographs, making ordinary objects appear extraordinary. Once you've selected your subject, consider how these additional elements can create atmosphere and bring the object to life. For instance, using a spray bottle to mist water onto the surface of your subject can create tiny droplets that catch the light and add texture. This is particularly effective on reflective surfaces or natural objects like flowers, where the water can mimic morning dew.
Alternatively, incorporating smoke can add a sense of mystery or drama to your image. A small smoke machine or a device like the LensGo Smoke-S can be used to gently waft smoke around the object, creating swirling patterns that add depth and movement to the photograph. When using smoke, ensure that the lighting enhances the texture and layers of the smoke without overwhelming the subject. Experiment with backlighting or side lighting to illuminate the smoke from behind, which will help it stand out against the darker areas of the image.
|
|
 |
To capture the perfect macro shot using a mirrorless or DSLR camera, one must approach the subject with a blend of technical precision and creative vision. The choice of macro lens is paramount, as these lenses are specifically designed to focus closely on small subjects while maintaining sharpness and detail. A tripod is another essential piece of equipment. This essential tool ensures stability without camera shake, which is crucial when working with a narrow depth of field.
Lighting plays a significant role in macro photography, and natural light often needs to be supplemented. LED light panels or a macro ring flash can help evenly illuminate the subject, reducing harsh shadows and bringing out the finer details. For those working in outdoor environments, a reflector will be handy in directing light onto the subject, particularly in shaded areas. Additionally, extension tubes or NiSi close-up lenses can be employed to achieve greater magnification, especially when working with lenses that do not natively offer macro capabilities.
Focusing can be particularly challenging at close distances, so a remote shutter release or utilising the camera’s timer can prevent any unwanted movement when the shutter is pressed. Some photographers also prefer to use macro sliders for precise adjustments, allowing the camera to move incrementally closer or further from the subject, ensuring the focus is exact. Lastly, diffusers can soften the light, reducing contrast and preventing overexposure of delicate highlights.
|
|
 |
NEED HELP? TALK TO AN EXPERT 1300 365 220 |
|
 |
 |
“You can look at a picture for a week and never think of it again. You can also look at a picture for a second and think of it all your life.”
— Joan Miro
|
|
 |
Your photo question of the week: |
|
What is "Rembrandt lighting"?
A) A lighting setup where the subject is evenly lit from all sides.
B) A lighting pattern where one side of the face is fully illuminated while the other side has a small triangle of light under the eye.
C) A technique that involves lighting only the background.
D) A method of using natural light from a window.
|
|
Last week’s question answer: |
|
In the field of digital photography, the term "debayering" refers to:
A) The algorithm used to convert raw image data from a camera sensor into full-colour image data.
B) A process used to remove digital noise from an image.
C) The technique of blending multiple exposures to enhance dynamic range.
D) A method of adjusting the colour balance to correct for lighting conditions.
|
|
 |
 |
A customer story: a camera, a trip and one happy customer |
|
Wenbin recently reached out to us after pre-ordering a Fujifilm X100VI, expressing his anticipation for the arrival of his new mirrorless camera. He had been kept up to date by the Digital Camera Warehouse team and, upon informing Dean at DCW of his upcoming trip on August 20th, we knew we had to ensure timely delivery.
At Digital Camera Warehouse, we pride ourselves on being honest and transparent about product availability and delivery times. Although we aim to meet all delivery schedules, we avoid making commitments we can't uphold. We value our customers too much to promise unrealistic delivery times. Fortunately, everything aligned perfectly this time, and we managed to deliver Wenbin’s camera just in time for his trip. Thank you, Wenbin, for your kind words and for choosing us!
"Thank you for your kind assistance and patient communication. I’ve received the camera and am already seated on board. I couldn’t have achieved this without your support and a bit of luck. I appreciate it once again, and I will choose Digital Camera Warehouse the next time I need to buy a camera." - Wenbin
|
|
 |
|
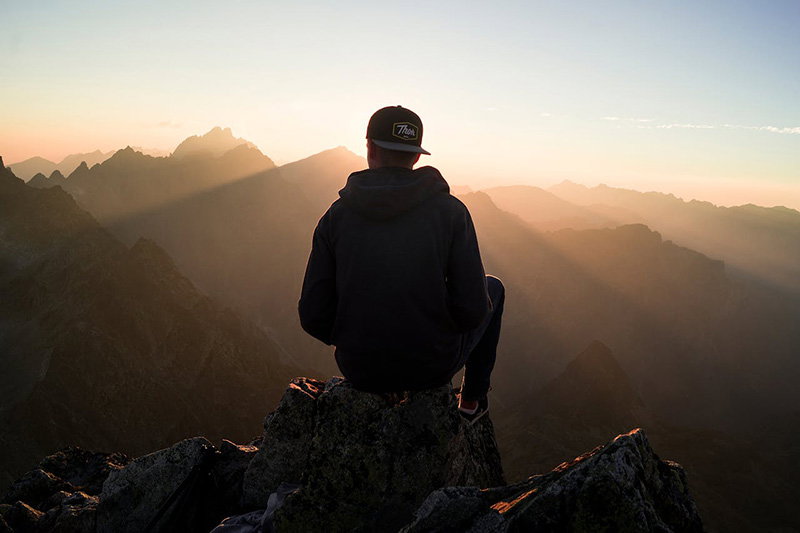
Navigate to our reader’s gallery to see a selection of entries to help inspire your vision. You can also see the past winners there. Thank you to everyone who sent in their images. We love seeing them!
Sometimes, all we need is some visual motivation, like these images, to spark our creative thoughts. What will you create with your camera this week? Enter your images via our online portal, and we look forward to showcasing them.
|
|
|
 |
 |
 |
Let's face it. Not all of us are professionals, and even still, pros still need to learn a thing or two about photography or cinematography. That's why we've put together this section. We want to highlight some of the common and not-so-common questions people face when attempting a particular genre. |
|
Take the frustration out of your focus system and stay sharp using these modes |
|
Focusing on a camera can often be a source of frustration, especially when you're trying to capture a once-in-a-lifetime moment, only to find your camera doesn't perform as you would have hoped.
Whether you're dealing with a fast-moving subject, a dimly lit scene, or simply trying to ensure your portrait has a pinpoint focus on the eyes, getting the camera to focus exactly where you want it can feel like a battle. But the key to overcoming this challenge lies in understanding the various focus modes your camera offers and knowing when to use them.
By mastering these modes, you can significantly reduce those moments of missed focus and capture images with the clarity and sharpness you've been striving for.
Single autofocus for still subjects
One of the fundamental focus modes is Single Autofocus, also known as AF-S, Still or One-Shot AF. This mode is designed for scenarios where your subject is stationary. When you half-press the shutter button, the camera locks focus on the subject and maintains it as long as the button is held. This makes it ideal for portrait photography, landscapes, and product shots, where the distance between the camera and the subject remains constant.
Continuous autofocus for moving subjects
In contrast, Continuous Autofocus, or AF-C (AI Servo AF), is your go-to mode for tracking moving subjects. Unlike Single Autofocus, this mode continuously adjusts the focus as long as the shutter button is half-pressed, ensuring that your subject stays sharp as it moves within the frame. This mode is essential for action-packed scenarios like sports, wildlife photography, or any situation where the subject is in motion.
Automatic autofocus for unpredictable scenarios
For times when you're unsure whether your subject will remain still or start moving, Automatic Autofocus, known as AF-A or AI Focus AF, offers a versatile solution. This hybrid mode allows the camera to automatically switch between Single and Continuous Autofocus, depending on the situation. It's particularly useful in event photography or street photography, where movement can be unpredictable, and you need the camera to adapt quickly to changing conditions.
Manual focus for precise control
Manual Focus (MF) allows you to fine-tune the focus manually using the focus ring on your lens. This mode is indispensable in macro photography, where the depth of field is extremely shallow and requires precise focus adjustments. It's also beneficial in low-light conditions such as astrophotography, where autofocus might struggle, or when you want to creatively control which part of your scene is in focus.
Face and eye detection for perfect portraits
With the advancement of autofocus technology, Face and Eye Detection Autofocus have become game-changers in portrait photography. These modes automatically detect and focus on faces or eyes, ensuring that the most critical parts of your subject remain sharp. This is especially useful for close-ups or headshots, where you want to ensure the eyes are in perfect focus, adding a professional touch to your portraits.
3D tracking or AI focus modes for complex motion
For the most complex motion scenarios, 3D Tracking or AI focus takes subject tracking to the next level. This mode uses a combination of colour, contrast, and motion information to follow your subject across the frame, even if it moves away from your initially selected focus point. It's an invaluable tool for capturing fast-moving subjects, such as birds in flight or athletes sprinting across a field, where the action is intense, and the movement is unpredictable.
|
|
|
 |
|
NEED HELP? TALK TO AN EXPERT 1300 365 220 |
|
|
|
|
|
|
|
|
|